COSC470
COSC470 Labs
Lab B
Lab B has been configured with the Anaconda environment named 'cosc470', and so you can work there on the exercises as well as the assignments for this paper. OpenCV, Tensorflow, Numpy and Matplotlib have been installed in that environment.
First time setup
If you haven't used Anaconda previously, you might want to download and run the python-anaconda-setup.sh script to add appropriate path to your environment variables and configure matplotlib for appropriate rendering option (this is all on the macOS login).
Terminal ![]()
If you want to run your scripts from the terminal, to switch on the 'cosc470' environment issue the following command:
$ source activate cosc470
at which point all the python paths will get switched to Anaconda's one. Your terminal's prompt should change the prompt to indicate the environment in use like so:
(cosc470) $
Anaconda Navigator ![]()
If you'd like to run Jupyter Notebook demos/notes from the lectures, the easiest way to fire the notebook is via Anaconda Navigator:
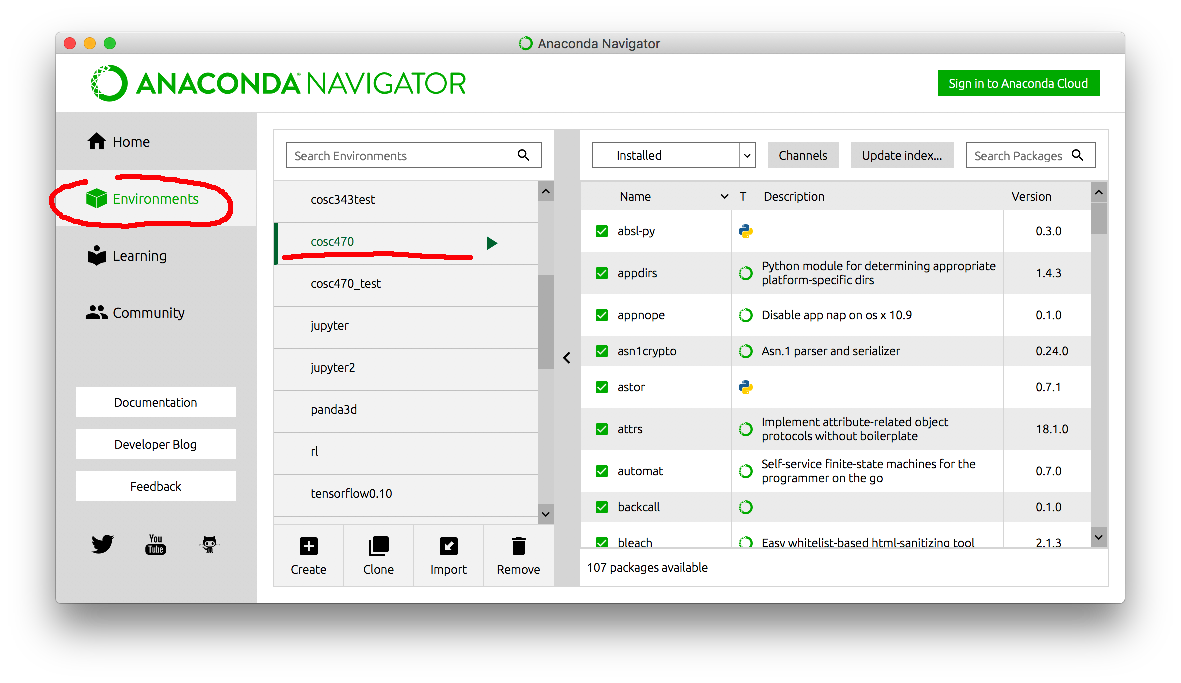
- Launch Anaconda Navigator.
- Select the "Environments" tab and click on "cosc470".
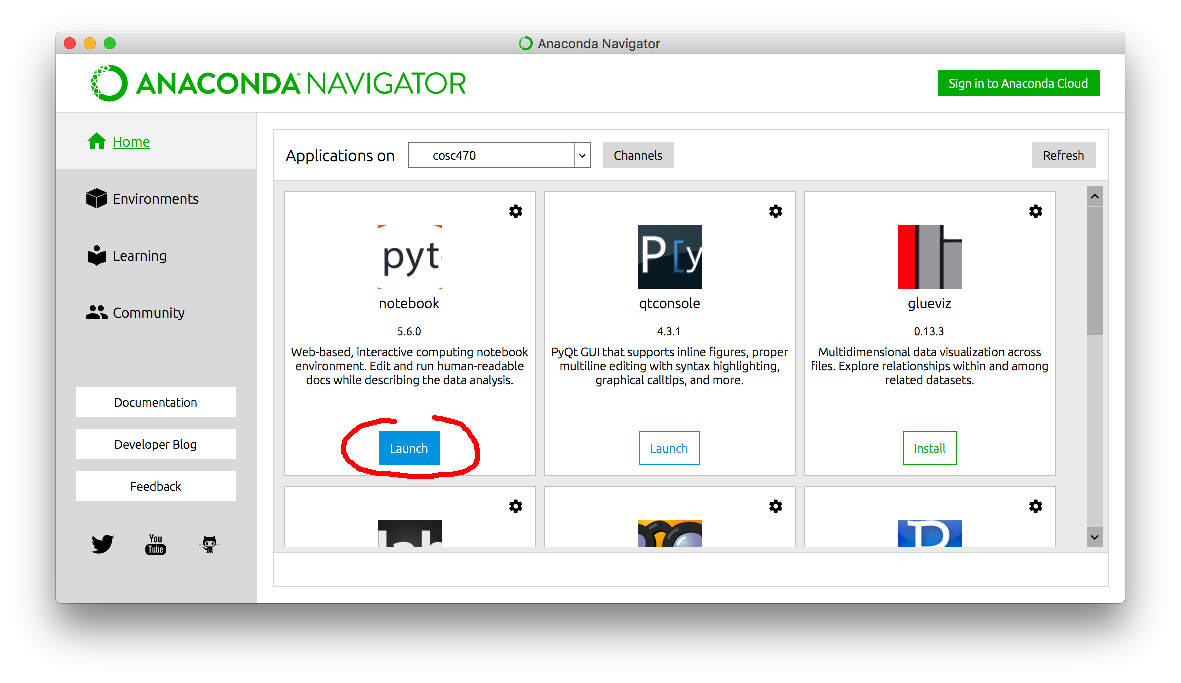
- Then, back in the "Home" tab, click on the "Launch" button under pyt notebook. This should open a browser from where you can find and run your .ipynb script.
PyCharm ![]()
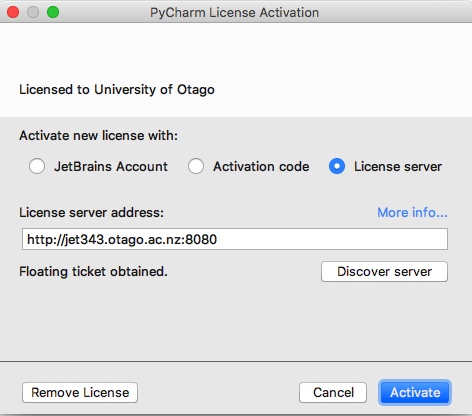
PyCharm is an IDE for python development. It's installed on the machines in Lab B. When starting it first time you may be asked about the License - select the License server option and put: http://jet343.otago.ac.nz:8080 as the server address. Click Activate and you should be ready to go.
Here's how to configure a PyCharm project to the 'cosc470' environment:
- After launching PyCharm create a new project
- In the next window select "Pure Python" and specify project's location.
- Expand the "Project Interpreter" option, select "Existing interpreter" and chose the one with the path "/opt/anaconda/evns/cosc3470/bin/python".
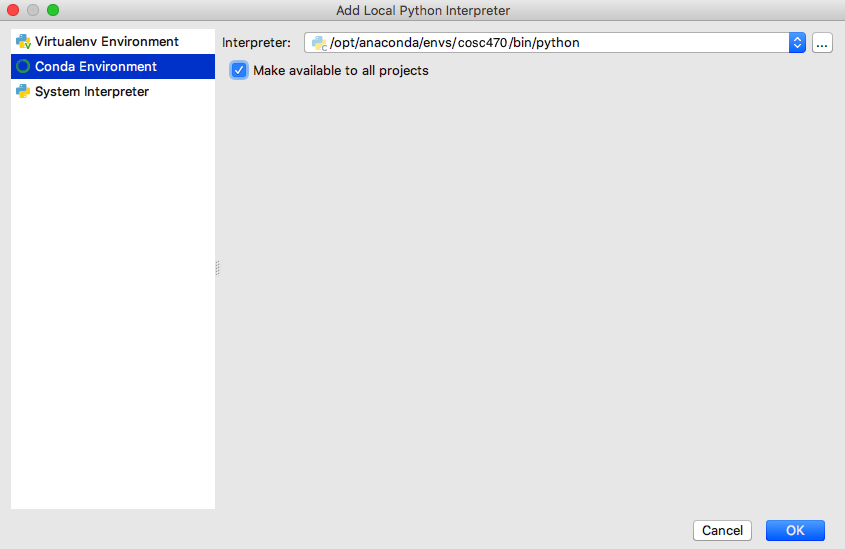
- If you don't have the option of the interpreter with that path, click on the cogwheel icon and select "Add Local". In the window that comes up, on the left-hand side select "Conda Environment" and for the interpreter browse to the path "/opt/anaconda/evns/cosc470/bin/python", select "Make available to all projects" and press OK.
- Click "Create". Once the project opens you might have to wait a little bit for the indexing process to finish (it needs scan all the libraries in the cosc343 environement).


Working at home
If you would like to work from home, you can download the Python environment (we use Anaconda) (select the Python 3.x installer). Anaconda is completely free and offers an easy, intuitive installation process and does not interfere with your system's default Python installation. Once Anaconda is installed you will need to create a new environment. It's best to download this file: cosc470.yml and then create a clone of the environment from our labs like so (this has been tested only on macOS):
$ conda env create -f cosc470.yml
The PyCharm IDE is also freely available. If you wish to install the Professional edition, Jetbrains gives away student licenses for free - apply for it here making sure to use your university e-mail.
